


Chrisfromky
Member
Hello all!
New here and wish I would have known about this forum back when I started some of my home repairs!! I will preface this by saying I am probably somewhere between a beginner and intermediate handyman and most things I have done thus far I have used YouTube to figure out how.
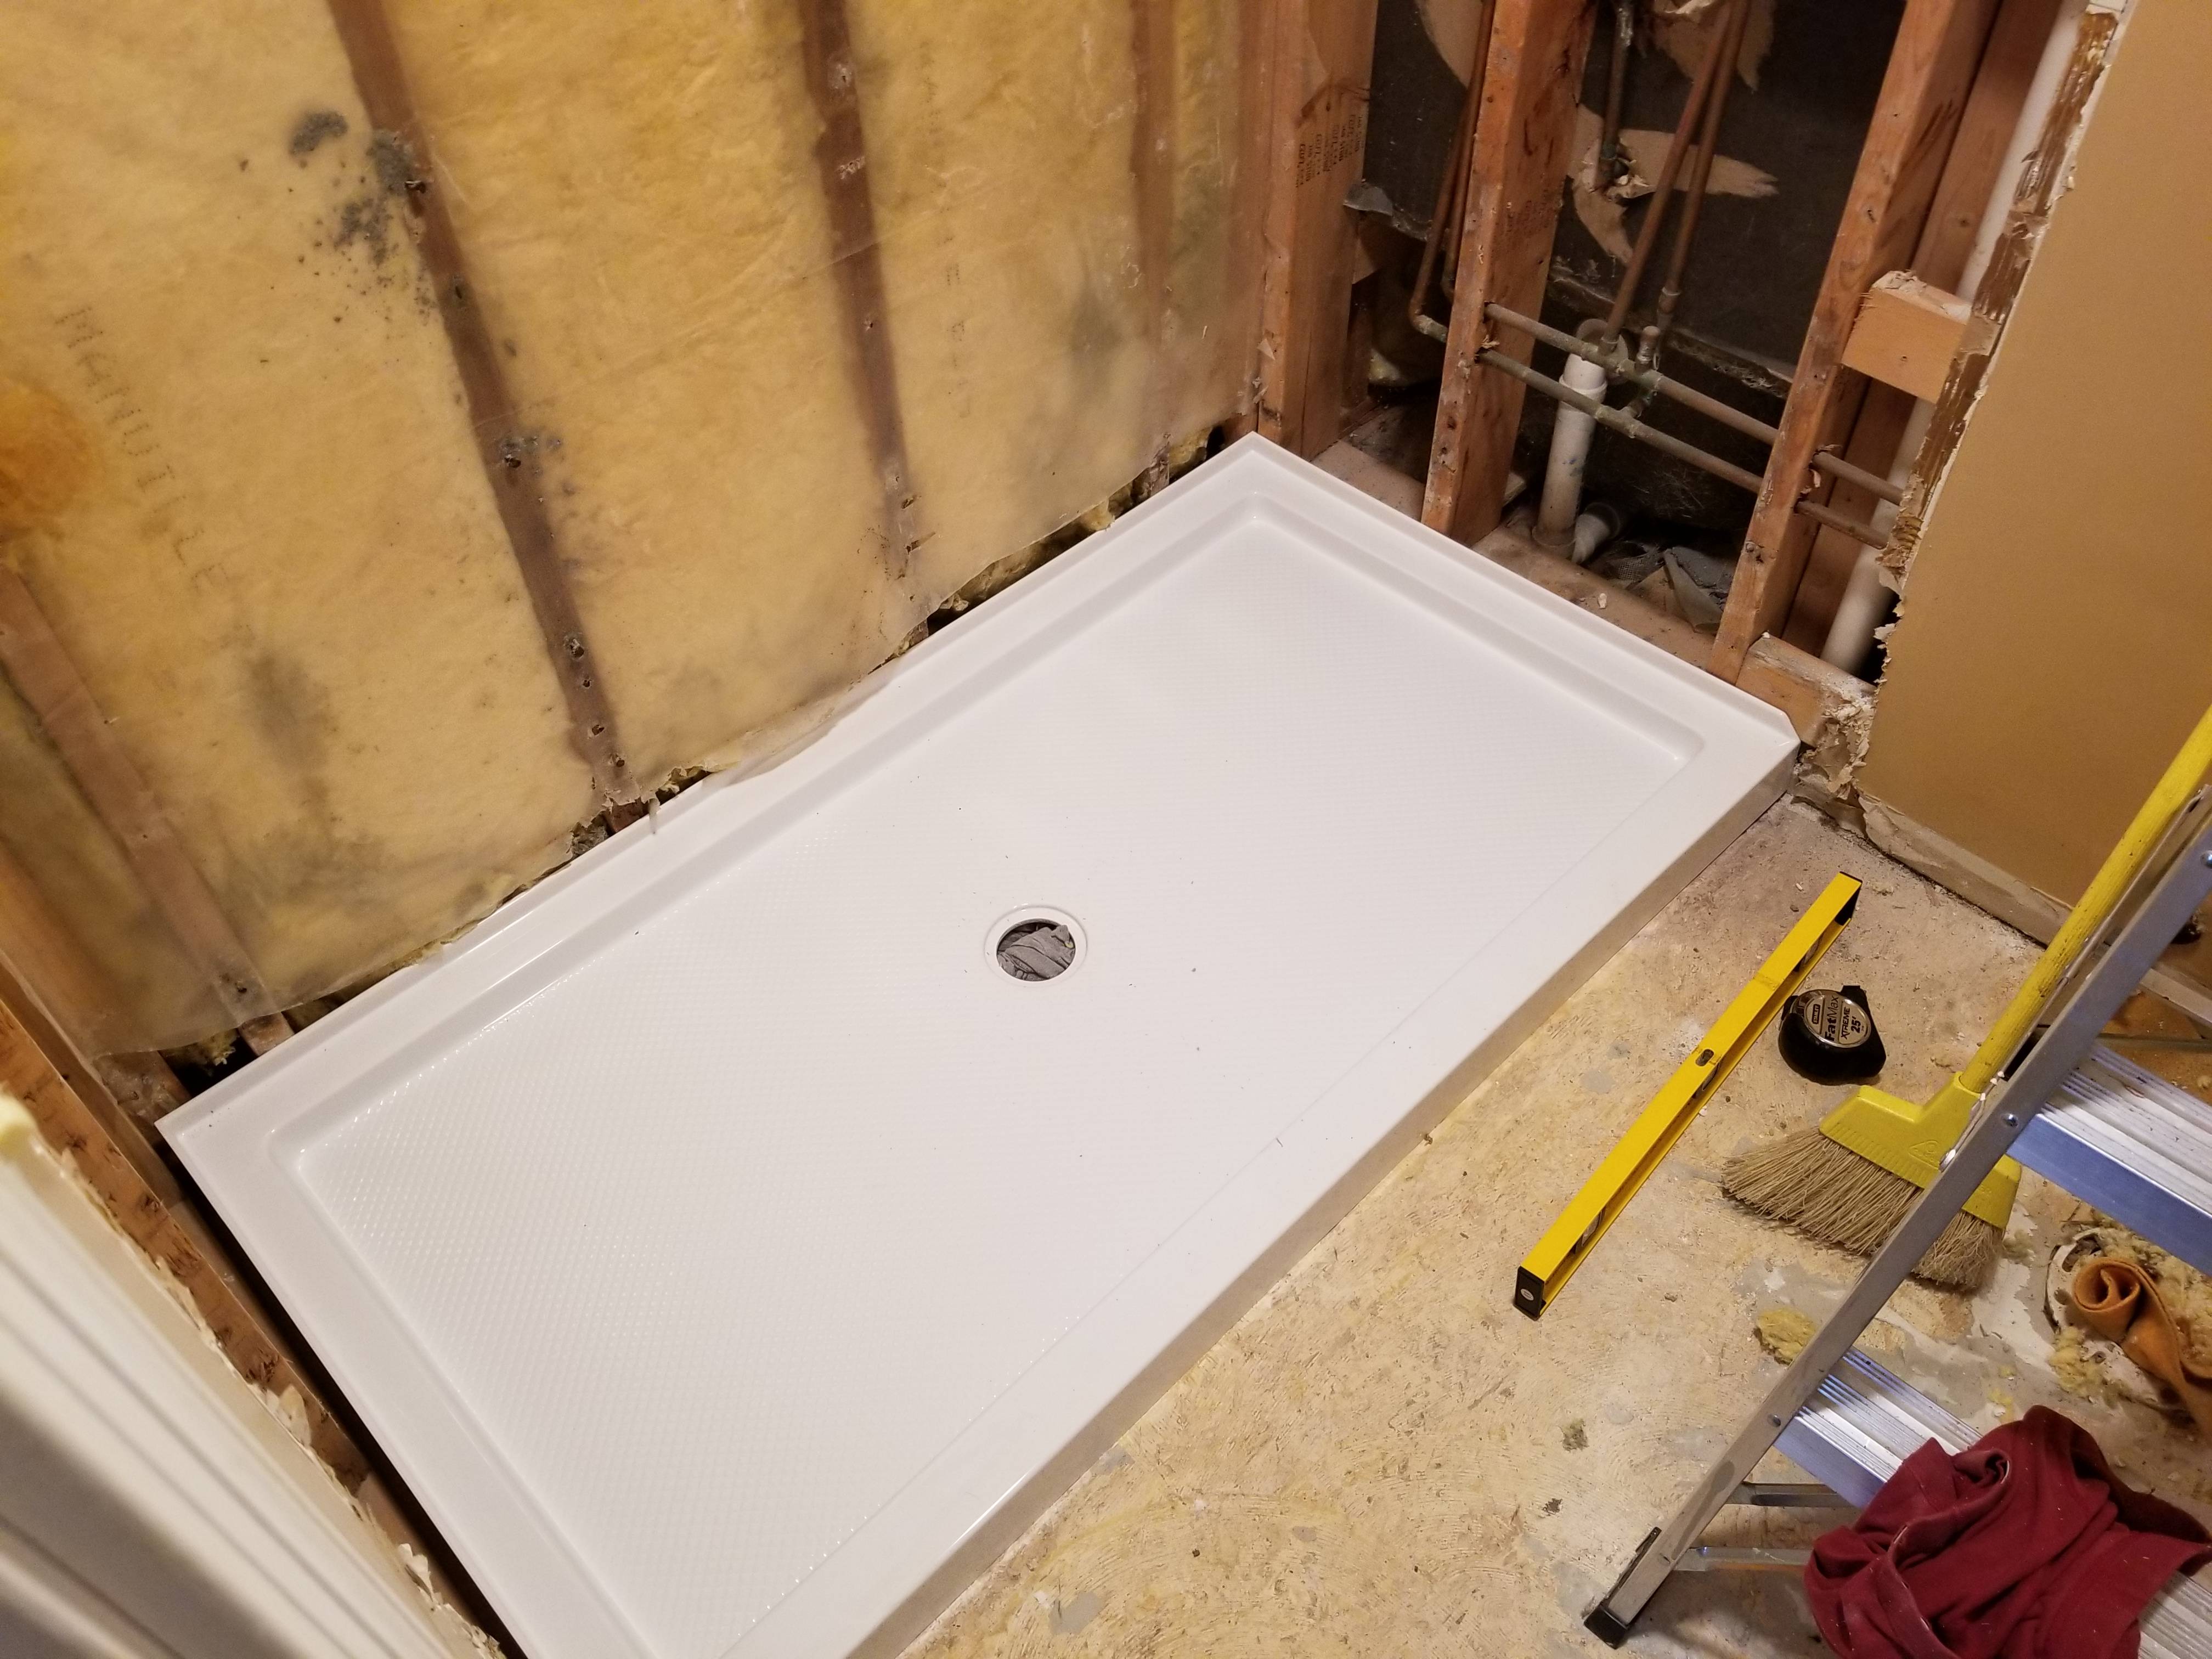
I am currently working on my master bath where I took the shower pan out and took walls down to studs, took toilet out, tile floor, etc.
1 year later it's about the same stage so I am now on a mission to finish this thing! I just want to put back the same thing I had (shower pan, green board, tile, etc).
I already have the shower pan the same size as my last one (32" x 60"") and its this specific one: https://www.homedepot.com/p/DreamLi...ld-Shower-Base-in-White-DLT-1132600/204047365
and its this specific one: https://www.homedepot.com/p/DreamLi...ld-Shower-Base-in-White-DLT-1132600/204047365
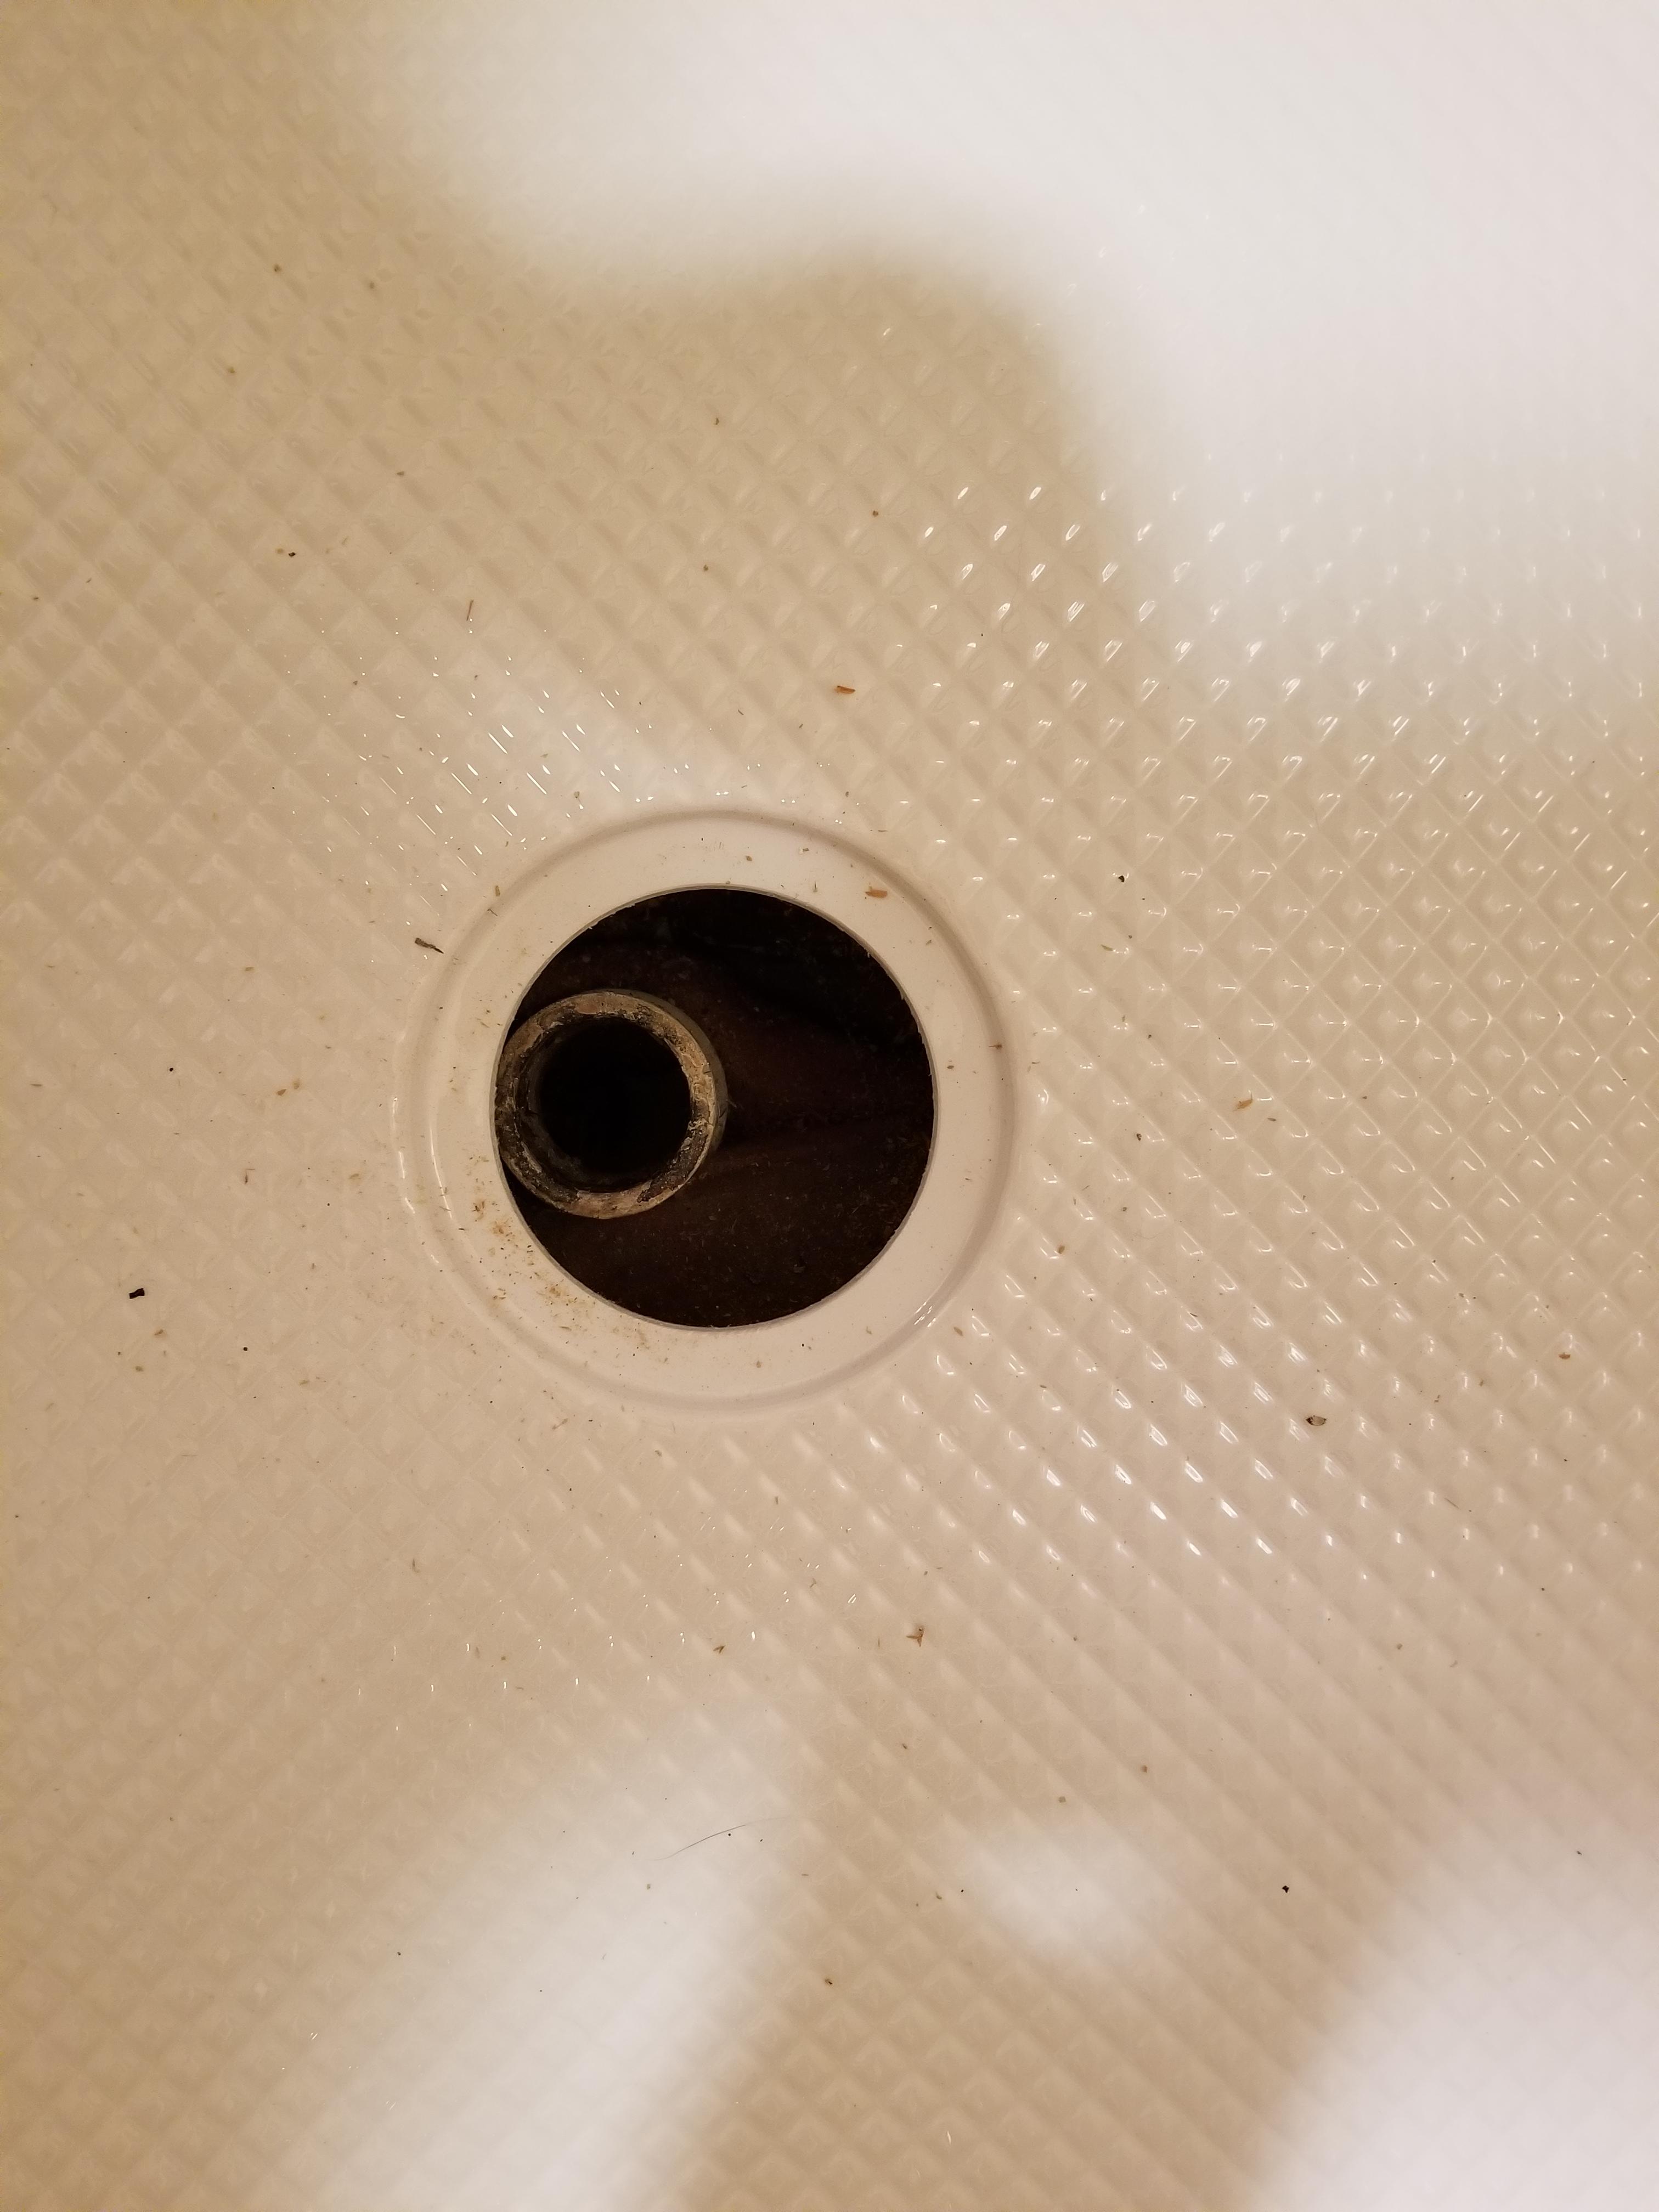
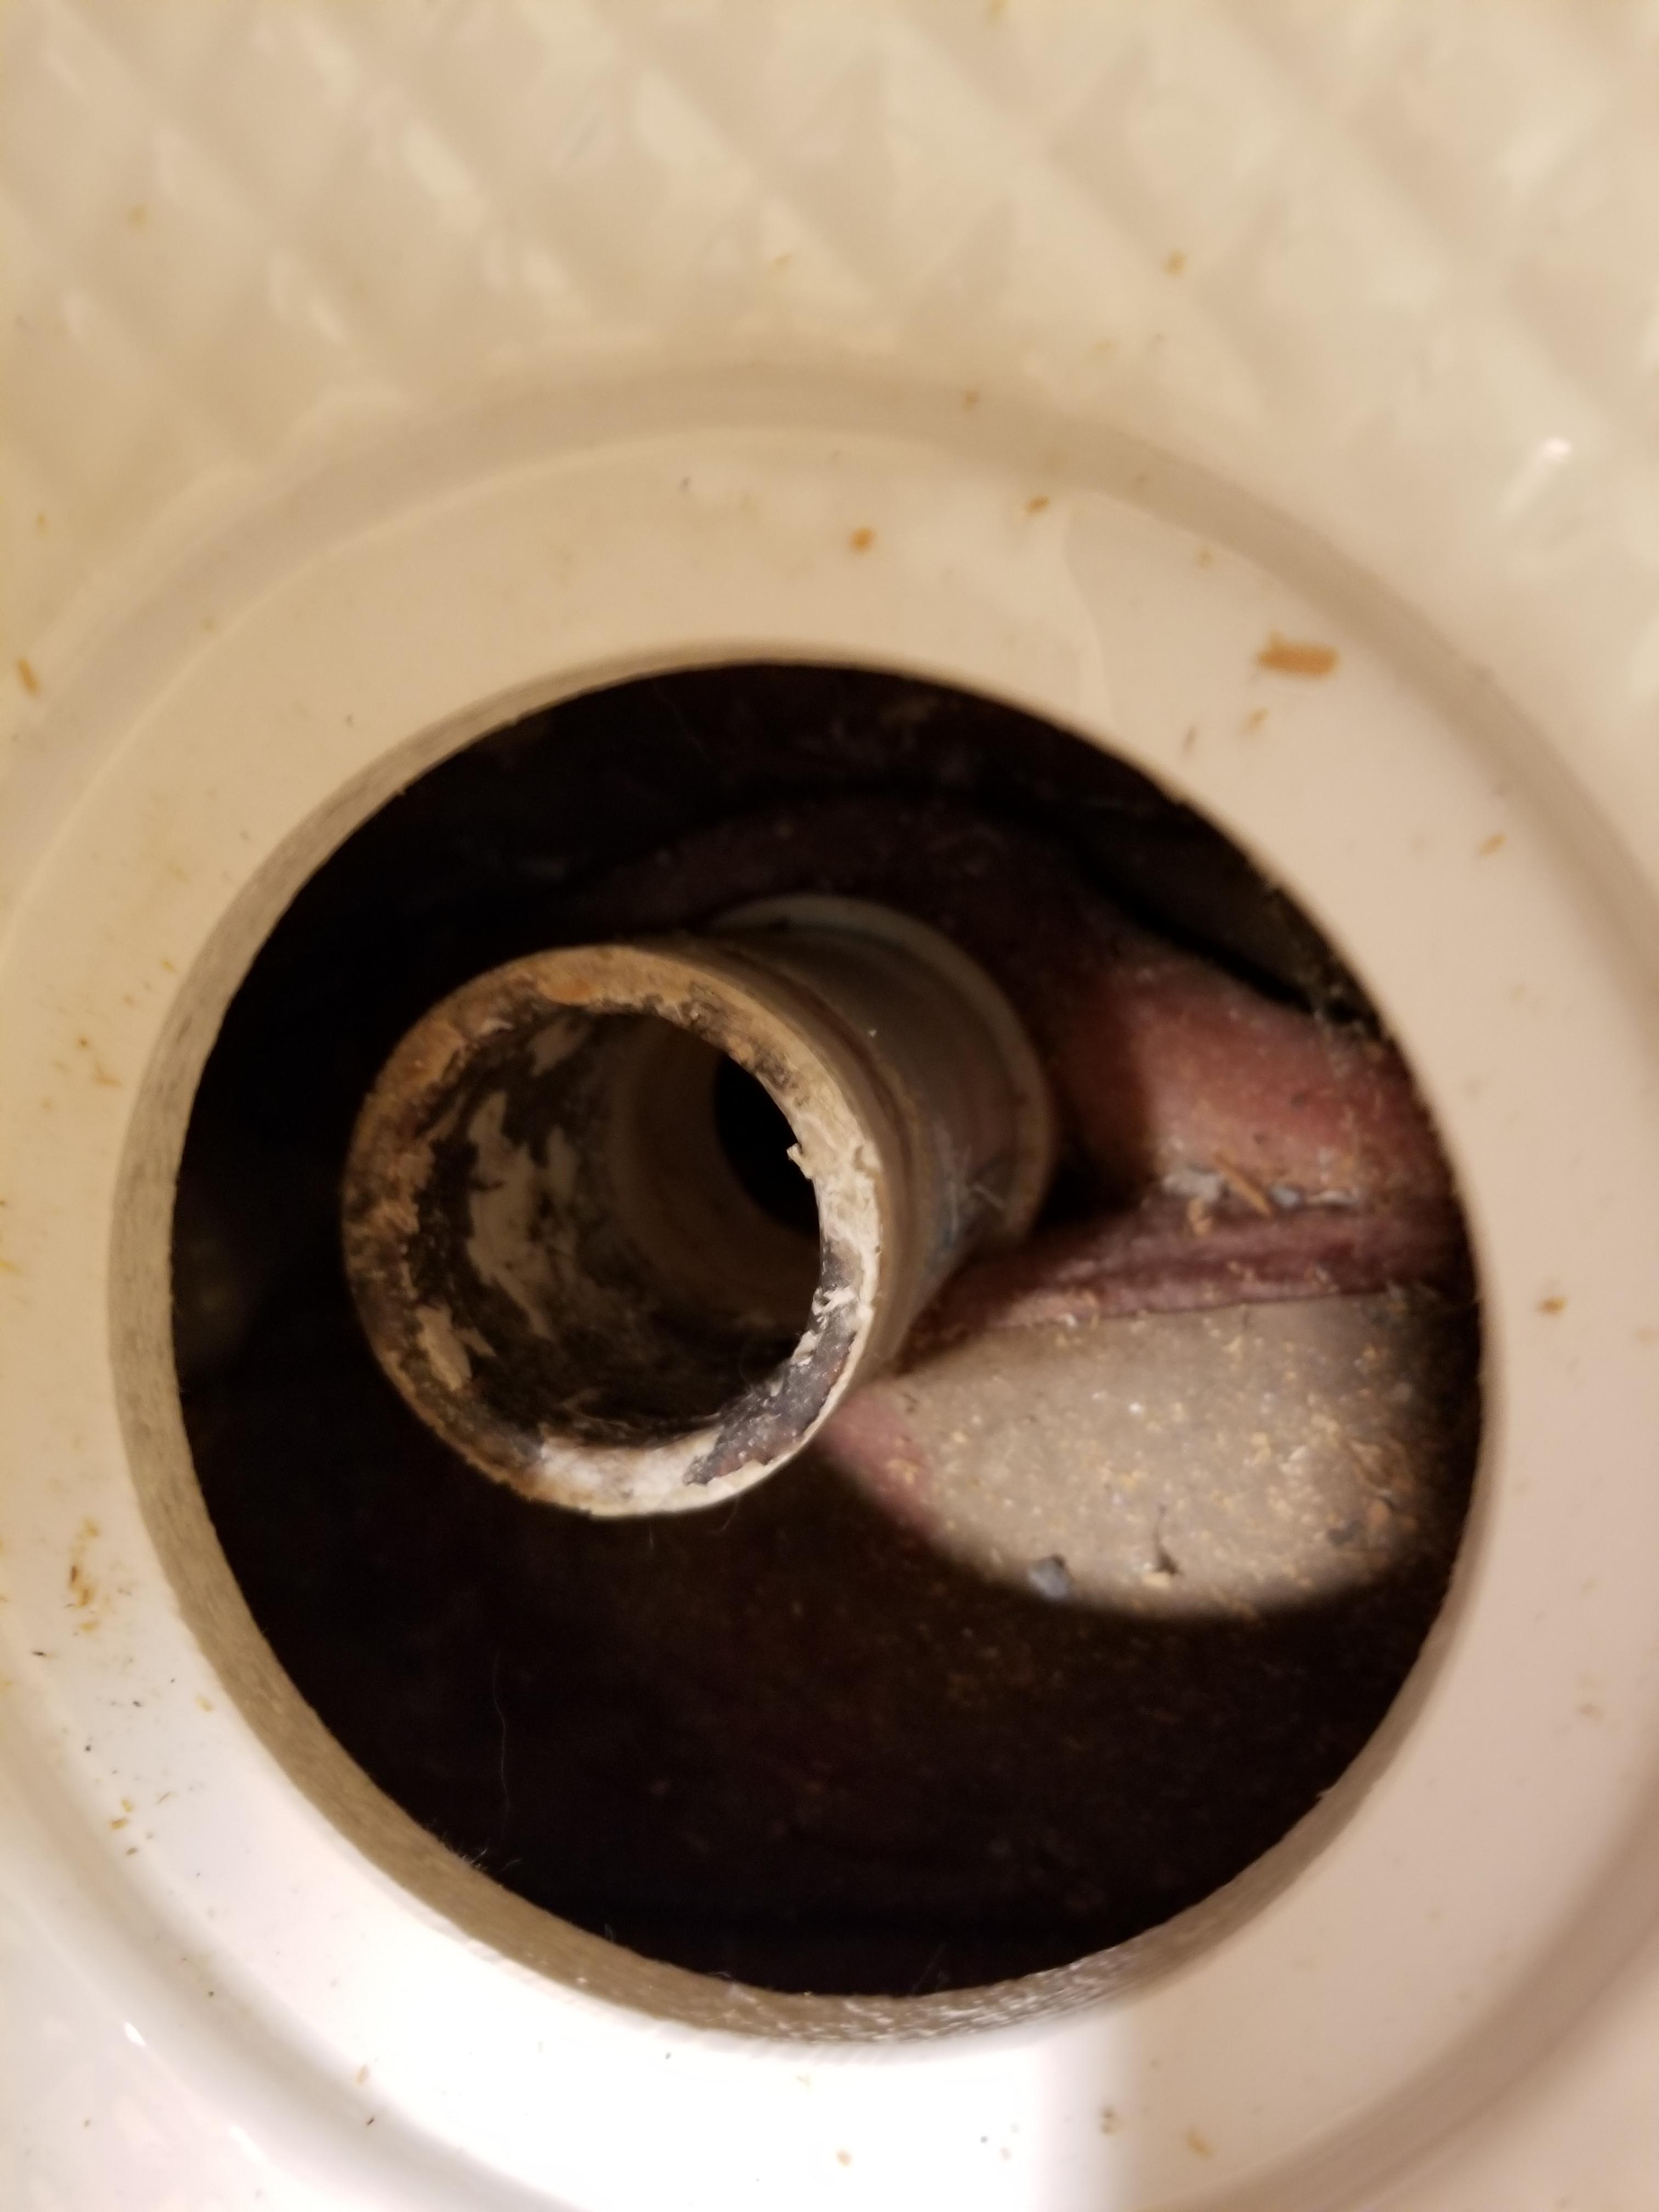
When dry fitting the pan, I noticed that the hole for the drain is in the middle lengthwise but side to side is at 15" instead of 16" where my drain pipe comes up.
This is an upstairs bathroom and I have no access to under it unless I cut a hole in my dining room ceiling which is the last thing I want to do!
Questions:
1) Is is better to either buy an offset drain like this one:
https://www.homedepot.com/p/Oatey-O...ERCH=REC-_-rv_nav_plp_rr-_-NA-_-303864623-_-N
OR
Screw some wood onto the back studs to push the base out 1/2" - 3/4" from the wall so that the pan hole now lines up perfectly over the drain pipe ?
If the answer is the offset drain, can you even install it from the top only? The only thing I can see on this topic is a couple of drains (Wing-tite and Bruco) that allows you to install from the top only by yourself. Neither seem to have an "offset" option.
2) When you are installing a drain from the top only, how in the world do you know if it leaks? Other than it leaking through the dining room ceiling I guess you just have to hope it was successfully?
3) This base has you put mortar under it to help make it solid and keep it from moving. I have seen some people online mention using this and some don't. Wouldn't I want to have some sort of tar paper or something on top of the wood sub floor so that moisture from the mortar doesn't seep down into the wood? If so, what material is ideal to use?
I guess that's it for now but I am sure there will be more as I get deeper into it.
Thanks in advance for any advice on any of the above!
Here are some pics that may help:
New here and wish I would have known about this forum back when I started some of my home repairs!! I will preface this by saying I am probably somewhere between a beginner and intermediate handyman and most things I have done thus far I have used YouTube to figure out how.
I am currently working on my master bath where I took the shower pan out and took walls down to studs, took toilet out, tile floor, etc.
1 year later it's about the same stage so I am now on a mission to finish this thing! I just want to put back the same thing I had (shower pan, green board, tile, etc).
I already have the shower pan the same size as my last one (32" x 60"
and its this specific one: https://www.homedepot.com/p/DreamLi...ld-Shower-Base-in-White-DLT-1132600/204047365When dry fitting the pan, I noticed that the hole for the drain is in the middle lengthwise but side to side is at 15" instead of 16" where my drain pipe comes up.
This is an upstairs bathroom and I have no access to under it unless I cut a hole in my dining room ceiling which is the last thing I want to do!
Questions:
1) Is is better to either buy an offset drain like this one:
https://www.homedepot.com/p/Oatey-O...ERCH=REC-_-rv_nav_plp_rr-_-NA-_-303864623-_-N
OR
Screw some wood onto the back studs to push the base out 1/2" - 3/4" from the wall so that the pan hole now lines up perfectly over the drain pipe ?
If the answer is the offset drain, can you even install it from the top only? The only thing I can see on this topic is a couple of drains (Wing-tite and Bruco) that allows you to install from the top only by yourself. Neither seem to have an "offset" option.
2) When you are installing a drain from the top only, how in the world do you know if it leaks? Other than it leaking through the dining room ceiling I guess you just have to hope it was successfully?
3) This base has you put mortar under it to help make it solid and keep it from moving. I have seen some people online mention using this and some don't. Wouldn't I want to have some sort of tar paper or something on top of the wood sub floor so that moisture from the mortar doesn't seep down into the wood? If so, what material is ideal to use?
I guess that's it for now but I am sure there will be more as I get deeper into it.
Thanks in advance for any advice on any of the above!
Here are some pics that may help:


