You are using an out of date browser. It may not display this or other websites correctly.
You should upgrade or use an alternative browser.
You should upgrade or use an alternative browser.
My bathroom repair project
- Thread starter Zanne
- Start date


Help Support Plumbing Forums:
This site may earn a commission from merchant affiliate
links, including eBay, Amazon, and others.
NOt sure what you used for the subfloor but it looks way too thin. You need to be usig 1/2 or 3/4.
SOunds like it all needs to be torn out then brand new everything. Sorry
The thin board is just the top layer over a moisture barrier. The part underneath is at least 3/4". I just patched the floor with something about the same thickness as the original boards-- but the original ones had expanded a bit from absorbing water over the years.
I agree its not the perfect solution, but nothing is done well in this house.
Thanks for the reply!
I would suggest not to use wood, otherwise you'll be tearing it out again because it's wet.
The right way would be cement board over the subfloor either 1/4, or 1/2 in then your tile goes on top of that. I wouldn't use the single square sticky tiles as you noted , those will just peal up once the floor gets
Wet then you'll be replacing it all again.
Use 1 sheet of linoleum and lay it down using the proper glue with the sides going up the wall to act as a base board. This way it's 100% water proof.
I would suggest not to use wood, otherwise you'll be tearing it out again because it's wet.
The right way would be cement board over the subfloor either 1/4, or 1/2 in then your tile goes on top of that. I wouldn't use the single square sticky tiles as you noted , those will just peal up once the floor gets
Wet then you'll be replacing it all again.
Use 1 sheet of linoleum and lay it down using the proper glue with the sides going up the wall to act as a base board. This way it's 100% water proof.
In retrospect I would have used cement board, but the wood is already in place and its going to get another coat of cement-like self leveling flooring on it. I have waterproof sealant I can put over the remaining wood. The original wood floor was installed under carpet and remained so for probably 20 or 30 years before we had linoleum installed. Unfortunately the septic system backing up broke the wax seal and caused the toilet to leak into the carpet that was installed under it and then saturated the top layer of floor on the one board that I removed.
I got sheet vinyl and have already installed it-- I did have some of it run up the walls. I made a bit of a mistake when marking for my template and ended up not having it go up far enough on one edge, but I'm going to tape the hell out of it and cover it with baseboard.
Thank you for your feedback, btw.
I will try to use cementboard in the next bathroom. Once this one is done, I need to replace the entire subfloor in the next one.
Can cementboard be put down directly across floor joists, or would I need wood underneath it? (I'm sort of thinking it would have to be the latter because I suspect cementboard would crack/break).
Luan is the correct subfloor/underlayment for sheet vinyl. Cement board is only necessary for ceramic, porcelain, or stone tiles. Don't install the cement board directly to the joists--it needs to be mortared to the plywood or OSB decking using thin-set and then screwed in place every 4-8" using galv. screws. I always use 1/2" or thicker cement board on floors, otherwise you'll have cracked tiles. Hope this helps on your next bathroom!
Luan is the correct subfloor/underlayment for sheet vinyl. Cement board is only necessary for ceramic, porcelain, or stone tiles. Don't install the cement board directly to the joists--it needs to be mortared to the plywood or OSB decking using thin-set and then screwed in place every 4-8" using galv. screws. I always use 1/2" or thicker cement board on floors, otherwise you'll have cracked tiles. Hope this helps on your next bathroom!
Ohh! Thank you very much! That will save me some trouble then. Would OSB be the proper subfloor for luan? I'm thinking in the next bathroom I will put down OSB or plywood that is 3/4 to 1/2 thick, topped with a moisture barrier, a layer of luan, and then the linoleum.
I actually have a thread for the other bathroom project, but it was specifically questions about the shower/tub combo. I will add to that thread to ask more about the flooring and how to get it level without having to use self-leveling compound.
Meanwhile, I noticed in another thread that the toilet flange is not supposed to be flush with the finished floor and I think my flange may end up being so. I need to figure out how to replace my current one or build it up higher.
Is there anything I can insert to raise it up a bit more? I think my friend accidentally bent it a bit when trying to get it level. The next time he's over I think I'll have him remove the screws while I get under the house and see if I can push the pipe up a little bit more and then he can shim it. That is assuming there is any room for it to move. If it can't move up then I'll have to consider other options. I do have an extra thick wax ring.
Again, thank you for the reply.
I'm thinking in the next bathroom I will put down OSB or plywood that is 3/4 to 1/2 thick, topped with a moisture barrier, a layer of luan, and then the linoleum.
Yes, that's how I would do that.
Is there anything I can insert to raise it up a bit more? I think my friend accidentally bent it a bit when trying to get it level. The next time he's over I think I'll have him remove the screws while I get under the house and see if I can push the pipe up a little bit more and then he can shim it. That is assuming there is any room for it to move. If it can't move up then I'll have to consider other options. I do have an extra thick wax ring.
Don't bother trying to push up the pipe from the bottom. You can buy closet flange spacers that mount to the existing flange and you can stack more than one. Don't try to stack wax rings to build up, they will eventually fail and seep water. Those spacer rings are only about 4 bucks apiece.
Thanks, oh_io!
Which would you go with?
a) OSB
b) Plywood
I found a plywood I could use as a top layer that is moisture resistant and designed to be an underlayment.
http://www.homedepot.com/p/t/203183010?storeId=10051&langId=-1&catalogId=10053&productId=203183010
Do you know the exact name for what I would need for the flange? Would it still have a proper seal if my current flange is bent?
Would this be about the right thing?
http://www.homedepot.com/p/Sioux-Chief-4-in-PVC-DWV-Gasket-Closet-Flange-886-GP/202313119
Or http://www.lowes.com/pd_253224-138-436443_0__?productId=3798891 ?
Would the latter require some sort of gasket?
I also found http://www.lowes.com/pd_253209-138-436453_0__?productId=3137587
I believe I actually already have http://www.lowes.com/ProductDisplay?partNumber=22062-943-21015 but I wonder if that would help...
I really appreciate the replies.")
Which would you go with?
a) OSB
b) Plywood
I found a plywood I could use as a top layer that is moisture resistant and designed to be an underlayment.
http://www.homedepot.com/p/t/203183010?storeId=10051&langId=-1&catalogId=10053&productId=203183010
Do you know the exact name for what I would need for the flange? Would it still have a proper seal if my current flange is bent?
Would this be about the right thing?
http://www.homedepot.com/p/Sioux-Chief-4-in-PVC-DWV-Gasket-Closet-Flange-886-GP/202313119
Or http://www.lowes.com/pd_253224-138-436443_0__?productId=3798891 ?
Would the latter require some sort of gasket?
I also found http://www.lowes.com/pd_253209-138-436453_0__?productId=3137587
I believe I actually already have http://www.lowes.com/ProductDisplay?partNumber=22062-943-21015 but I wonder if that would help...
I really appreciate the replies.
Depending on how bent the original flange is, you may want to go with the Lowes gasket, spacer kit (the 13.00 dollar one) because the rubber gasket may help the spacer seal to the bent flange and you can use the included rubber shims to shim your bent closet flange back to level. If you can unscrew the original flange and get it unbent, the 3.00 1/2" spacers from should be enough. You shouldn't need any of the other products you linked.
As for the moisture resistant luan, sounds like a winner. I'm not one to unnecessarily over do something, but a layer of tar paper over the luan wouldn't be a bad idea. Hope this helps
As for the moisture resistant luan, sounds like a winner. I'm not one to unnecessarily over do something, but a layer of tar paper over the luan wouldn't be a bad idea. Hope this helps
Depending on how bent the original flange is, you may want to go with the Lowes gasket, spacer kit (the 13.00 dollar one) because the rubber gasket may help the spacer seal to the bent flange and you can use the included rubber shims to shim your bent closet flange back to level. If you can unscrew the original flange and get it unbent, the 3.00 1/2" spacers from should be enough. You shouldn't need any of the other products you linked.
As for the moisture resistant luan, sounds like a winner. I'm not one to unnecessarily over do something, but a layer of tar paper over the luan wouldn't be a bad idea. Hope this helps
Thanks! I'll be going up to the town that has Lowes and Home Depot next Wednesday, so I should be able to see what they have in stock. I'll take note of the item numbers so they can look them up. Calling won't do any good because that store's phone system is terrible. I've found that the website is not accurate about the store's inventory. Even though its more expensive, I'm sort of leaning toward the kit because it has stuff I could possibly use in the other bathroom if necessary.
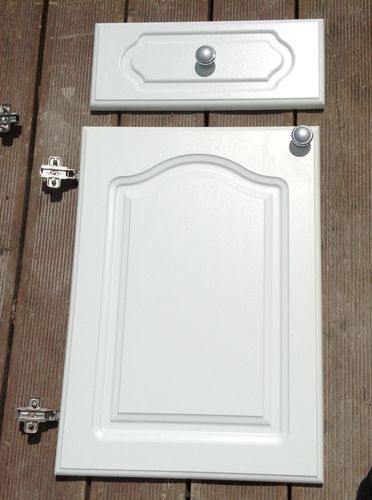
I put another coat of paint on the vanity and doors. There was some weird reddish brown stuff that kept coming to the surface in little speckles. I used a brush instead of a roller for the most recent layer of paint because the roller wasn't filling in some of the cracks. It doesn't look great, but the surface of the vanity is gouged and ugly and the doors were pretty crap quality plywood. I'd really love to replace them with cathedral style doors (same with the drawers). The quality of the material is too crappy for me to use a router to make them cathedral style. I wonder if I could make my own out of some scrap lumber down at the workshop.
I'm thinking of doing another layer of paint but use a spray can to get a smoother finish. The paint roller left some sort of texture (even though it was supposed to be smooth) and the brush left streaks. I'll have to take the doors outside to paint them though.
I'll add pictures later.
Edit: Pictures!
I'm seriously considering putting beadboard over this-- if I could find some cheap enough that is moisture resistant.

You can sort of see the spots coming through on the door closest to the wall


I used some leftover linoleum to catch paint splatter.
I'm not the best painter in the world, but its ok for meatball carpentry.
I'm thinking of doing another layer of paint but use a spray can to get a smoother finish. The paint roller left some sort of texture (even though it was supposed to be smooth) and the brush left streaks. I'll have to take the doors outside to paint them though.
I'll add pictures later.
Edit: Pictures!
I'm seriously considering putting beadboard over this-- if I could find some cheap enough that is moisture resistant.
You can sort of see the spots coming through on the door closest to the wall
I used some leftover linoleum to catch paint splatter.
I'm not the best painter in the world, but its ok for meatball carpentry.
Last edited:
I am wondering if you might need to use a high hide primer?
I am wondering if you might need to use a high hide primer?
I'm not sure. The weird thing is that the marks didn't show through the primer when I put it on...
I'm starting to lean more toward replacing the doors and drawer faces with cathedral style ones (if I can figure out how to make them).
I was thinking of something like this:

but more glossy like this (but with pulls instead of knobs)
I need to figure out if I could just route the pattern into a thick enough board or something... Nothing heavy though.
I really wish I had space to hide the fugly cut marks on the actual vanity that are visible when the doors are off.

In retrospect, I should have used some sort of wood putty or something to fill those in, but I didn't notice until I started painting.
I can't remember if I mentioned it or not, but I'm going to use this to secure the edges of my vinyl (unless anyone thinks this is a bad idea)
Roberts 1-7/8 in. x 50 ft. Roll of Max Grip Vinyl Installation Tape
http://www.homedepot.com/p/t/100658261
Last edited:
Zanne,
I think you'd be better off trying to find raised panel doors at a used cabinet/reuse building material shop than making them. That is, unless you have an in-table router set up that you could make the rails and stiles and a panel bit to rout the raised panel. Raised panel doors aren't made of a solid piece of wood--the center panel is actually loose inside the frame to allow it to expand and contract as it takes on moisture and dries out. Even if you could plunge rout that profile into a solid piece of wood (which would be dangerous and time consuming), the door would inevitable warp. I buy a lot of cabinet doors from my local habitat for humanity restore, or you could see if there's an architectural salvage near you--those places are a gold mine!
I think you'd be better off trying to find raised panel doors at a used cabinet/reuse building material shop than making them. That is, unless you have an in-table router set up that you could make the rails and stiles and a panel bit to rout the raised panel. Raised panel doors aren't made of a solid piece of wood--the center panel is actually loose inside the frame to allow it to expand and contract as it takes on moisture and dries out. Even if you could plunge rout that profile into a solid piece of wood (which would be dangerous and time consuming), the door would inevitable warp. I buy a lot of cabinet doors from my local habitat for humanity restore, or you could see if there's an architectural salvage near you--those places are a gold mine!
Zanne,
I think you'd be better off trying to find raised panel doors at a used cabinet/reuse building material shop than making them. That is, unless you have an in-table router set up that you could make the rails and stiles and a panel bit to rout the raised panel. Raised panel doors aren't made of a solid piece of wood--the center panel is actually loose inside the frame to allow it to expand and contract as it takes on moisture and dries out. Even if you could plunge rout that profile into a solid piece of wood (which would be dangerous and time consuming), the door would inevitable warp. I buy a lot of cabinet doors from my local habitat for humanity restore, or you could see if there's an architectural salvage near you--those places are a gold mine!
Ahh! Ok. So there are multiple layers to it? I know that on the flat panel cathedral ones its 4 pieces (top, bottom, and 2 sides) on top of the regular panel. I wasn't sure how the middle was accomplished. I think I would be hard pressed to find the right sizes for my cabinets. As far as I know, there aren't any salvage places in my area. People don't really do much recycling here and a lot of stuff gets destroyed. The city dump does not allow people to salvage materials that have been dumped there (due to safety issues and fear of people being injured).
I can still look around though.
I'm glad you gave me this info so I won't try to do it out of a solid piece.
I nixed the flat panel version because it meant that the handles for the doors would jut out more than the handles for the drawers-- unless I cut a groove. Plus I do like the raised better aesthetically. I could probably try to do flat panel and make the groove for the hardware though.
You could purchase a few nice pieces of trim and add them to the edges to make it appear to be a raised panel door.
You could purchase a few nice pieces of trim and add them to the edges to make it appear to be a raised panel door.
I was thinking about that, but I only saw pieces to make it have the raised part on the edges and not in the middle. I didn't see anything that would fit in the middle.
To be clear, the one with the part that goes up in the middle is what I'm calling "raised panel" and the one with just raised parts on the edge and a flat middle, is what I'm calling "flat panel". I might not have the industry terms correct.
Here is what I'm calling flat panel cathedral style:

The project is on hold until the rain clears up more. I need to keep myself from forgetting about it so I can just get it done without the leveling mix going bad.
I will probably only need half of the leveling mix from the bag to level things out. Anyone have suggestions on how to only get half without making a mess? The bag is 50lbs.
Also, I'm looking ahead and trying to figure out what to do for a replacement surround. My current one is yellowed and disgusting.
Since my brother will need to use this shower, I'm looking for a showerhead that can go above his head without having to be held up by hand. I, too, would like to not have to duck to get under the showerhead while it is locked in place.
I'm considering http://www.amazon.com/gp/product/B001NFZ01U/?tag=skimlinks_replacement-20 by Zoe Industries.

The shower arm raises the height of the showerhead by 10 inches.
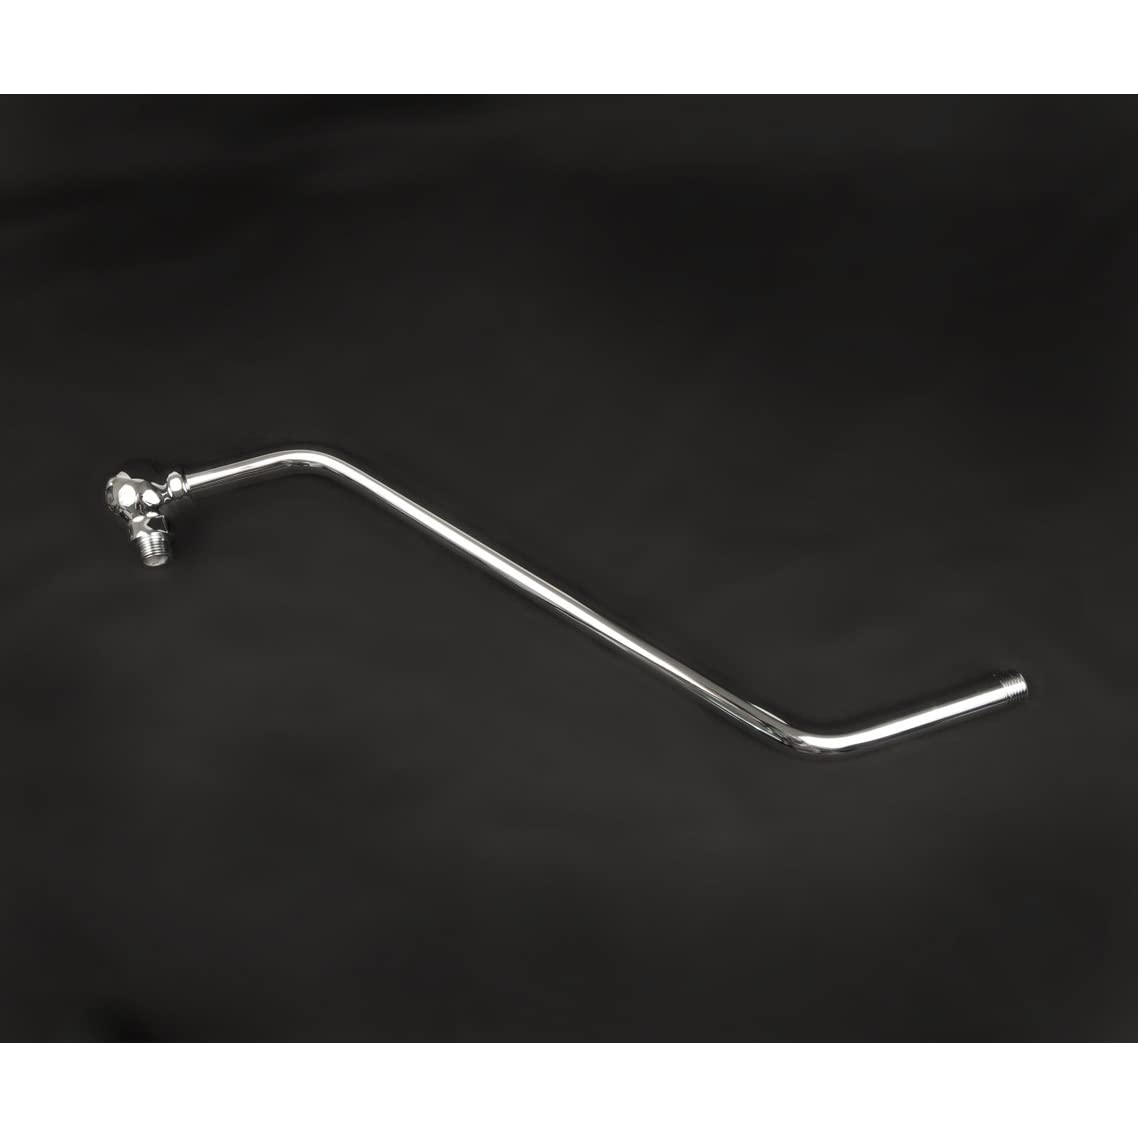

This one comes with a handheld shower sprayer as well. But I've never heard of the company or product before so I don't know much about the quality. Thus far it has good reviews on Amazon.
Another option is to get the arm for the Moen Waterhill
http://www.amazon.com/dp/B0012C5136/?tag=skimlinks_replacement-20
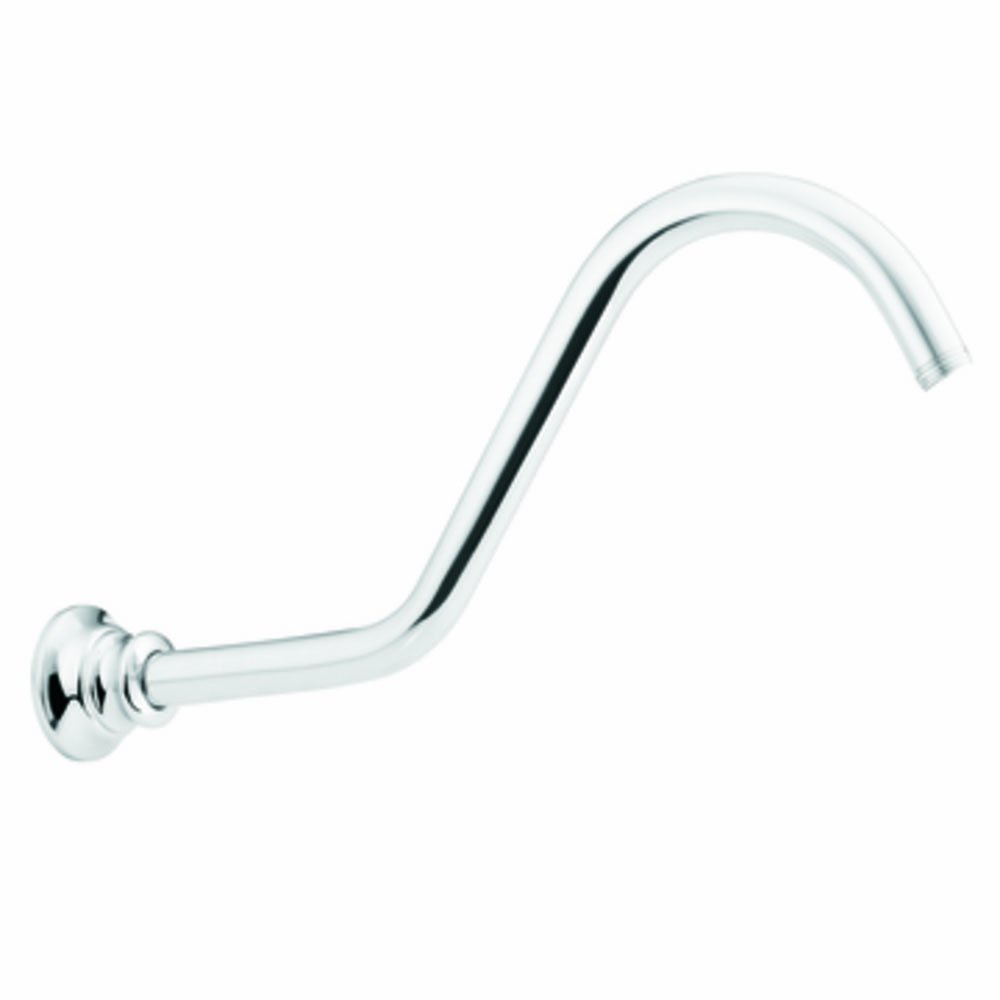
But it doesn't raise the arm up as much, does not come with a handheld (or even a showerhead) and is pretty expensive. To be honest, the thing I like best about it is the flange but I don't think that is sold separately. It's also supposed to be very sturdy. Oh, and I do like the shape.
The head for it is expensive as hell though. I do wonder if it could be converted to use a different showerhead.
This is what it looks like with the Moen Waterhill showerhead (I would get a different lever-- I'm leaning toward the Moentrol single lever valve)
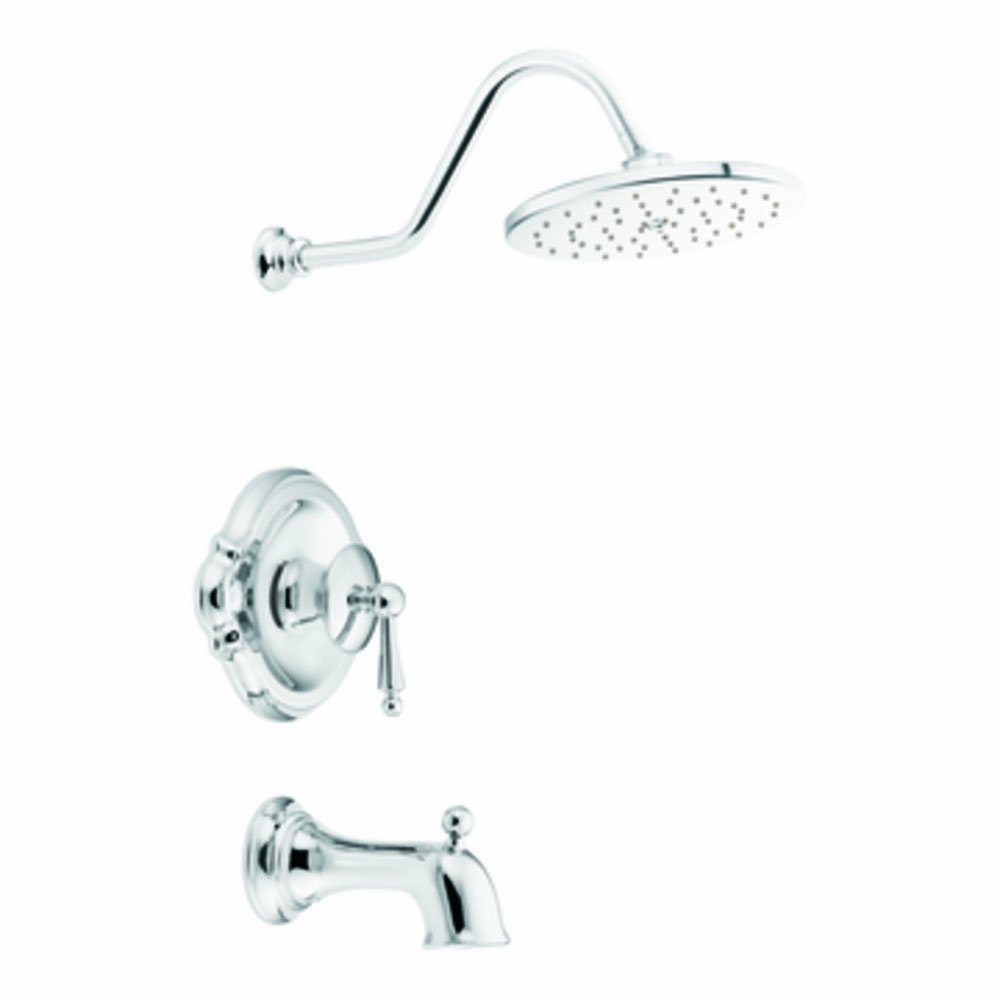
I was thinking of getting the Moen Kingsley or Monticello tub spout and lever. The Monticello one I can get with different lever options (porcelain, brass, chrome) that attach to the handle hub. I'm trying to locate an escutcheon that doesn't have the red and blue lines on it.
http://www.amazon.com/dp/B000UNYCZQ/?tag=skimlinks_replacement-20

http://www.amazon.com/dp/B000TFC202/?tag=skimlinks_replacement-20

Another thought for a showerhead http://www.amazon.com/dp/B00AGODD54/?tag=skimlinks_replacement-20

or http://www.amazon.com/dp/B001OKEFI8/?tag=skimlinks_replacement-20

or http://www.amazon.com/dp/B004ZP97BO/?tag=skimlinks_replacement-20
Any suggestions?
I really should focus on one thing at a time. LOL.
I will probably only need half of the leveling mix from the bag to level things out. Anyone have suggestions on how to only get half without making a mess? The bag is 50lbs.
Also, I'm looking ahead and trying to figure out what to do for a replacement surround. My current one is yellowed and disgusting.
Since my brother will need to use this shower, I'm looking for a showerhead that can go above his head without having to be held up by hand. I, too, would like to not have to duck to get under the showerhead while it is locked in place.
I'm considering http://www.amazon.com/gp/product/B001NFZ01U/?tag=skimlinks_replacement-20 by Zoe Industries.
The shower arm raises the height of the showerhead by 10 inches.
This one comes with a handheld shower sprayer as well. But I've never heard of the company or product before so I don't know much about the quality. Thus far it has good reviews on Amazon.
Another option is to get the arm for the Moen Waterhill
http://www.amazon.com/dp/B0012C5136/?tag=skimlinks_replacement-20
But it doesn't raise the arm up as much, does not come with a handheld (or even a showerhead) and is pretty expensive. To be honest, the thing I like best about it is the flange but I don't think that is sold separately. It's also supposed to be very sturdy. Oh, and I do like the shape.
The head for it is expensive as hell though. I do wonder if it could be converted to use a different showerhead.
This is what it looks like with the Moen Waterhill showerhead (I would get a different lever-- I'm leaning toward the Moentrol single lever valve)
I was thinking of getting the Moen Kingsley or Monticello tub spout and lever. The Monticello one I can get with different lever options (porcelain, brass, chrome) that attach to the handle hub. I'm trying to locate an escutcheon that doesn't have the red and blue lines on it.
http://www.amazon.com/dp/B000UNYCZQ/?tag=skimlinks_replacement-20
http://www.amazon.com/dp/B000TFC202/?tag=skimlinks_replacement-20
Another thought for a showerhead http://www.amazon.com/dp/B00AGODD54/?tag=skimlinks_replacement-20
or http://www.amazon.com/dp/B001OKEFI8/?tag=skimlinks_replacement-20
or http://www.amazon.com/dp/B004ZP97BO/?tag=skimlinks_replacement-20
Any suggestions?
I really should focus on one thing at a time. LOL.
Last edited by a moderator:
If you're replacing your old surround, just replace the supply to the shower head with a longer piece then you could use a standard (and presumably cheaper ) fixture. ??
Yeah. That's another option. Currently my shower only has a low arm with a handheld showerhead. I was thinking it might be cool to have the rainshower and the handheld, but I don't know how that will work out when it comes time to actually buying stuff. Its more of a wish list type thing of what I wish I could do vs what is practical and economic. LOL.
I'm still trying to figure out what I can get for a surround.