Leaking Sink Supply Lines

Plumbing Forums

Help Support Plumbing Forums:

This site may earn a commission from merchant affiliate links, including eBay, Amazon, and others.

Solid

Well-Known Member
Joined
Jan 24, 2012
Messages
126
Reaction score
7
Location
,
So, I noticed that the wall under my bathroom sink (top floor, within the vanity) was wet. It looked like it was coming from the hot water supply line, but I couldn't really see any signs of leaking on the visible part, so I opened up the wall. It turns out that most of the wall was wet, and moldy, so I removed more than I wanted to, and actually I still have to remove a little more. It turns out that both the hot and cold lines are leaking - take a look:
bathroom-1.jpg


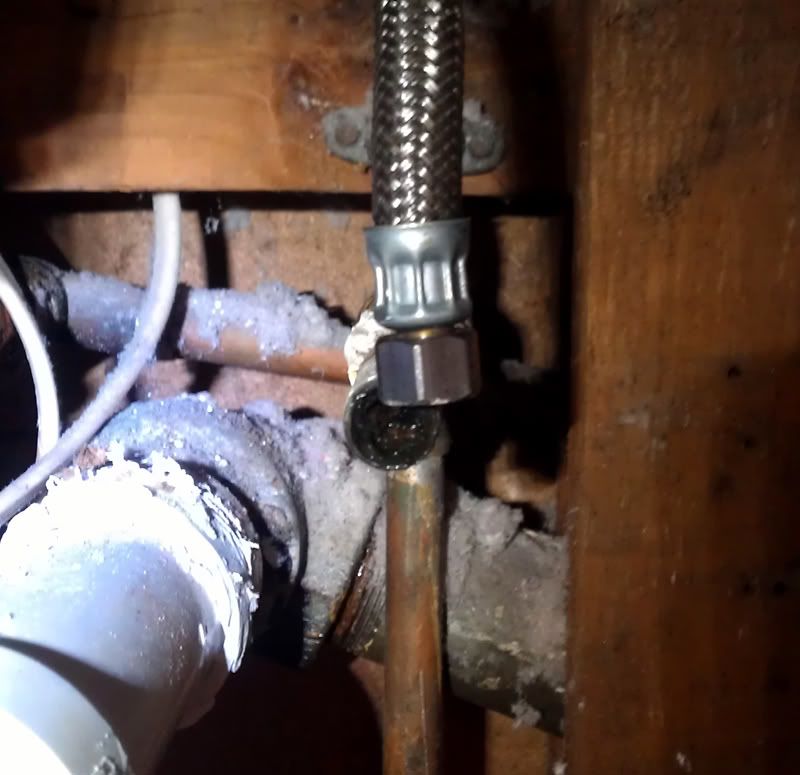
Here is an extreme closeup of the hot water line (I'm trying to show you all the connection to the copper tee ):
bathroom-2.jpg


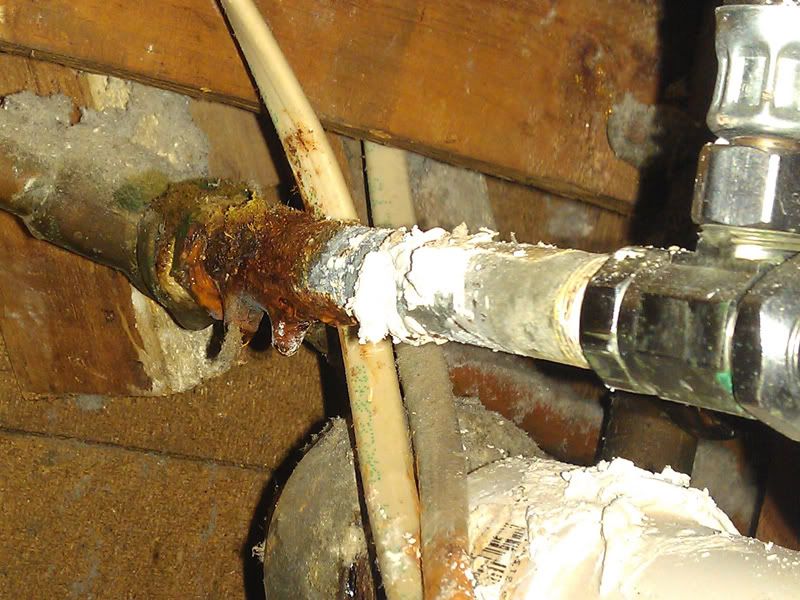
Please notice the Stalactites that are forming on the dripping spot - pretty cool. Also, I think there is some moss growing on the top of the copper, but I'm not sure.

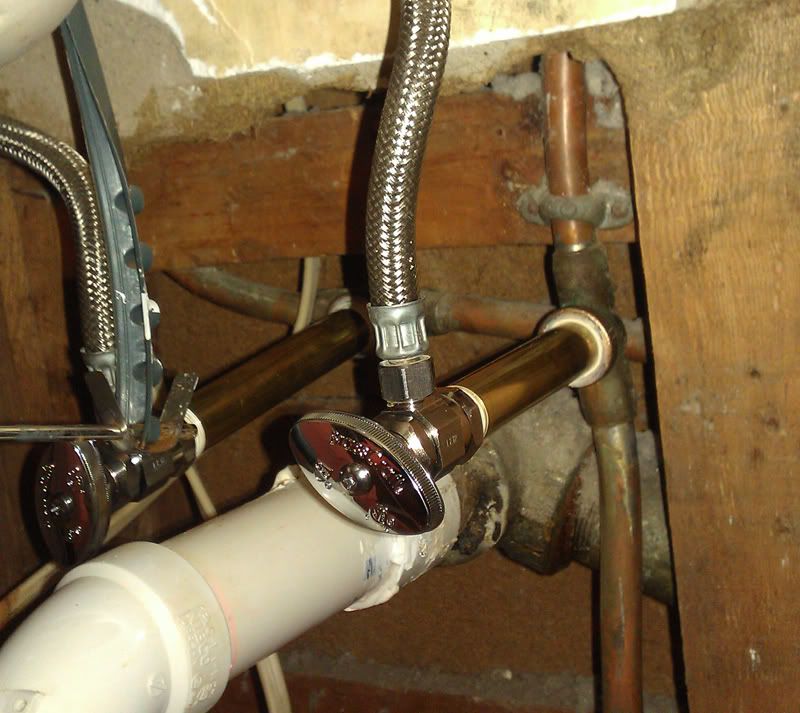
The lines continue up the inside of the wall beyond the tee, and just dead end about 2 ft. above the top of vanity. I don't know why they do this, unless it is supposed to prevent water hammering? Anyway, here is my question: Should I try to remove that section of threaded pipe and replace from there, or remove the copper tee and replace with a 90? The electrical wires you see will be moved - I have no idea why someone would run them like that.

Thanks in advance.
 
The pipes that are leaking appear to be galvanized nipples, can't really tell from the pics but I would say 1/2 inch or 3/8 in size. The copper going up the wall are what we call an air hammer arrestor they prevent the lines from banning when the water is shut off quickly. Two feet seems a little extreme a foot is more than enough. There a couple of different fixes here. My guess is the nipples are probably going to break when u try to remove them in which case you could either try to use an easy out, or if your soldering skills are up to it replace the brass tees. They are 1/2 inch sweat by 1/2 thread. U can either go back with the same fitting or replace them with a 1/2 inch sweat drop ear 90 new nipples and stops and viola.
 
After looking again I did notice a bushing in the first tee, definitely a 1/2x3/8 bushing, so no need to lower the lines back down to 3/8 just run them back out and put a 1/2 female x 3/8 compression stop on a couple of 1/2 inch nipples
 
Those are 3/8" galvanized nipples. If buy chance you can remove them without them breaking then just replace them with brass nipples. If they were brass to start with you wouldn't be having this problem. I would also check any other sinks plus the toilets for the same problem. If they used galvanized on that sink I'm sure they used them throughout the home.

John
 
Hey guys, thanks so much for the quick replies.

So, just to be sure, can you check that these are the parts (links below) that I would need assuming I can get them apart (The links will take you to Home Depot.)?

Bushing

Nipple

When I make these connections, I assume I just need to use Teflon Tape and/or pipe dope on the threads?

Also, does anyone have any helpful tips on remove the galvanized bushing? Maybe I could gently heat the copper tee? And, what should I be prepared to do if I am unable to get these apart, or break them in the process?

Finally, Just so you know, I will be checking the toilet supply line as well, even though I really didn't want to open up the wall at that spot. This is the only bathroom that is on the second floor of my home.
 
Sorry, after reading again, I think I am not supposed to use the bushing. I should use this 1/2" nipple straight off the copper tee:

Nipple

And then this:

Valve

Is that correct?
 
Yes to the 1/2 inch nipple straight off the tee, the bushing looked to be brass so it should turn out of the tee with a crescent or small pipe wrench, then Teflon and dope the new nipple I would recommend four to five wraps with tape screw it in, use a brass nipple for sure. Teflon and dope the other end screw on your 1/2 female by 3/8 compression stop, reattach your supply line and let er rip
 
Be careful if you do decide to heat the brass tee though too much heat and you will unsolder it completely in which case clean the copper with sand cloth really well, needs to be super clean, apply flux, and sweat on a brass drop ear 90 then install new nipples and stops after not has cooled with Teflon/pipe dope
 
Thanks Reedplumber. I will first try with no heat at all, and go from there. If I can't get it off, and I use your drop ear 90 fix, this would eliminate the plumbing above the current tee (air hammer arrestor) - would this cause any problems for me?

I've never sweat any copper fittings before, so this would be my first attempt. I understand that cleanliness is the key here, and also, not burning down my house in the process.

I have another question: is there a tool that is used to tighten the brass nipples to the tee? I'm thinking I can just thread a couple nuts on the opposite end and use that to gain some leverage.
*I think the answer here is a pipe wrench (duh), assuming it won't mar the exterior of the pipe?*
 
Last edited:
A pipe wrench or pair of channel locks should suffice...
 
Thanks everyone, I'm going to work on it this weekend - will report back results.
 
OK, everything is up and running with no leaks.

I'm surprised that water was even able to pass through the old nipples:
clog.jpg


Here's the new brass nipples (1/2"):
new-pipes.jpg


I bent the old copper lines a little bit when I removed the old bushings - I tried to block them in with some wood first, but it didn't work very well. I was worried about it, but nothing leaks, so I suppose everything is OK. I have another question; when I eventually finish this wall, I assume I will have to remove the angle valve and supply line, so I can cut and fit some sheet rock. I'm a little concerned that I will loosen (or tighten) the nipple and cause another leak that I will then be unable to really see (because it will now be behind a finished wall). Do you think that is going to be a problem?
 
Just remove the supply line at the stop and remove the stop handle -- make holes just large enough to fit over stops, the escutecheon will cover hole. buy chrome escutecheons that opens & close.
 
If you don't want to sweat in a new copper piece you could use a piece of pex, with 2 pex adapters if you know someone with a pex expander
 
Back
Top