Sweating copper near plumbers tape

Plumbing Forums

Help Support Plumbing Forums:

This site may earn a commission from merchant affiliate links, including eBay, Amazon, and others.

branimal

Well-Known Member
Joined
Feb 27, 2017
Messages
210
Reaction score
12
Location
NYC
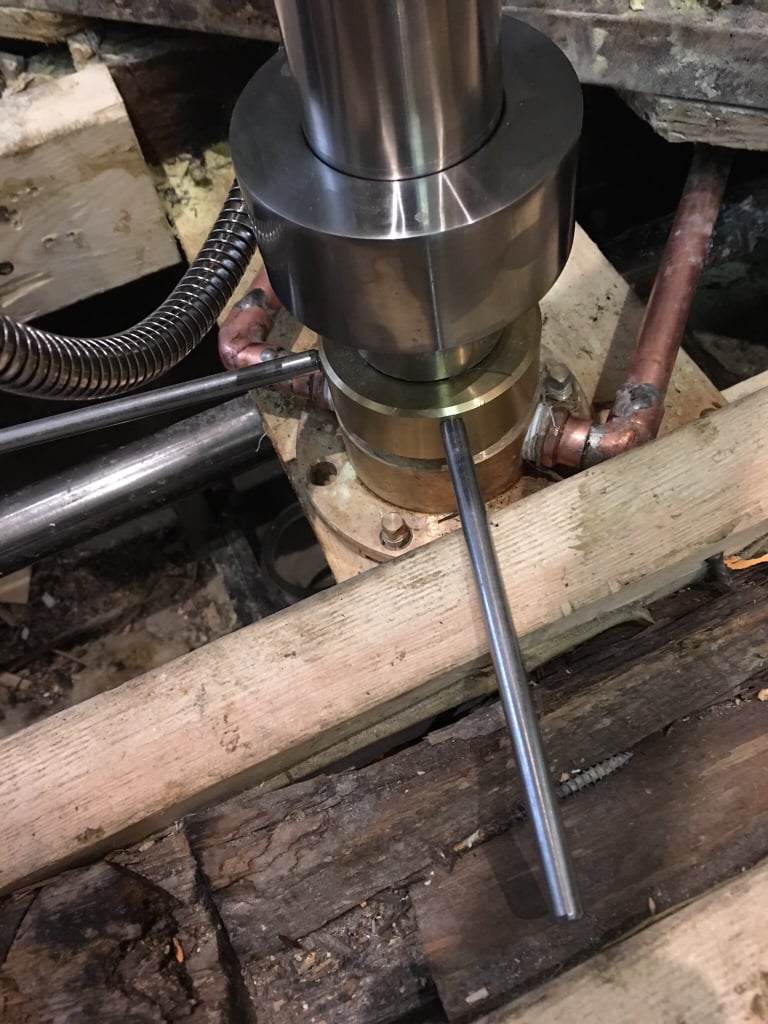
I'm installing a tub filler in my bathroom reno. I think sweating the copper from the valve pictured below back toward the supply line will be the easiest way to make sure things line up.

My questions are:
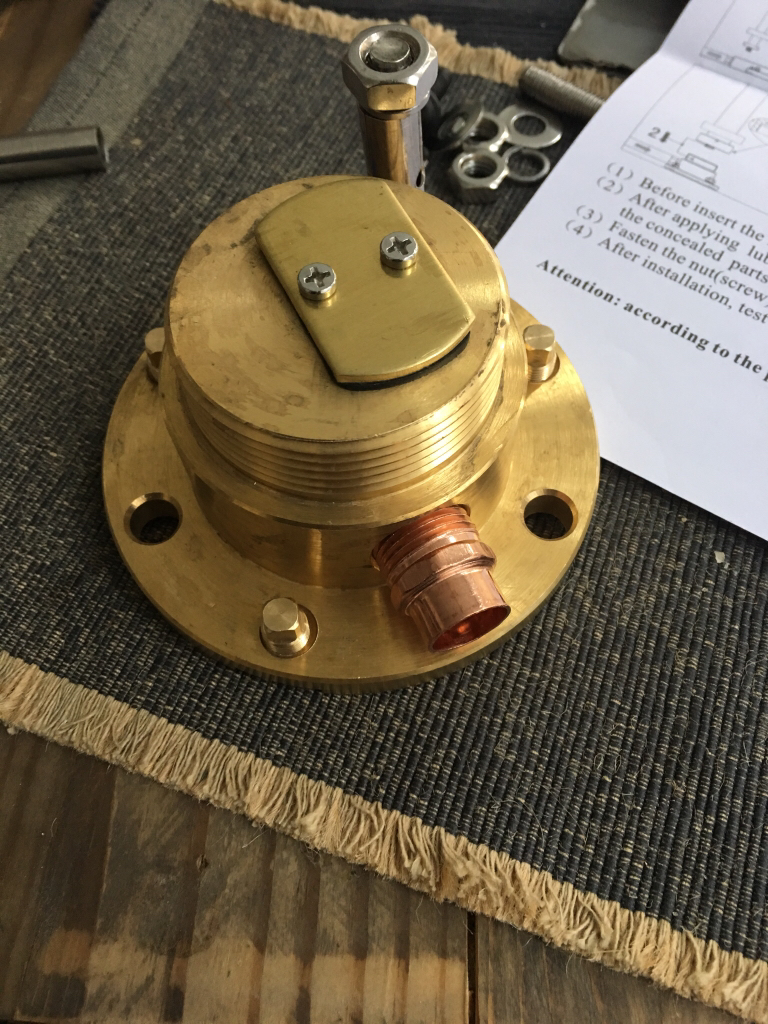
1. Do I need to use plumbers tape on the male copper threads screwed into the valve. Pic below.

2. Will sweating the copper fittings melt the plumbers tape to the point it no longer holds the seal.

db454972e7b00ce86acb8aad732f6fde.jpg
 
Will a wet rag on the pipe protect the teflon tape's Integrity for sweats further up the pipe?
 
That will help, but I usually prefabricate as much as I can before I thread it on. If it's close quarters, be very careful how much heat you apply. Once solder starts flowing, that's enough. Also remove any rubber components from the tub filler before soldering
 
That will help, but I usually prefabricate as much as I can before I thread it on. If it's close quarters, be very careful how much heat you apply. Once solder starts flowing, that's enough. Also remove any rubber components from the tub filler before soldering


Yeah very tight spot. I think I'll use unions so I can tighten last fitting into place.

Good call on removing any rubber.
 
My code would allow it, but im Canada. Just curious what your code states about using copper?


I think buildings taller than 3 stories require copper pipe.

I believe the concern is fires melting pex. That's why nohub cast iron is required as well.

Rats are another concern.
 
I sweated the male adapter to a 90 and then a short run of copper. Then installed into the valve body with plumbers tape. Put a wet rag on the spot marked with a pink line and sweated the rest of the copper run into place. Seems to be holding.

When I went to install the tub fillers post to the valve, screwing it tight leaves the spout not looking straight ahead. I'll try wrapping the valve's threads with plumbers tape to have it snug up where I want it. Guess I should have installed the spout onto the valve first to see where it gets tight.

f9a0cc137cb0b453123a26f677515f4a.jpg


4fce3bb9755d7eb0fd8227eee19a9e6a.jpg
 
So I just read up on plumbers tape. It's a thread lubricant and sealant. So my idea of wrapping plumbers tape won't work.

I'll look at shimming the valve body as shown below. Maybe some rubber washers.

I want the spout to face in the direction of the pink arrow. Not the green arrow.

cbe46c595355ebeec1ffda165dafd2db.jpg


590bfc8a1be44b9377b9bf41e490b44b.jpg
 
are going to bury that valve without an access door?
whatcha gonna do if you need to change an oring?


Damn good question. The access points to remove the top brass assembly (where the orings are located) are level with the joists. If I could make an Allen key style tool perhaps I could slip that in the space between the escutcheon and the top brass assembly. I wouldn't bank on it.

What do you suggest?
0765978d4fe891b6f021084571f4871d.jpg


bcd6f473bc730c60319060e0d50738a0.jpg
 
Hey just wondering did you use Type L copper because I can see the barcode on that piece of copper in the picture has a red tag on it.
 
Back
Top